


Evaluating Sun Exposure, Shading, and Optimal Positioning of the Panels
When selecting a site for solar panel installation, consider areas with unobstructed access to sunlight for at least six hours daily. Any obstruction, such as trees and buildings, causes partial shading, which can greatly degrade solar panel performance. To maximize solar energy capture, panel orientation may need to be adjusted seasonally to align with the sun’s changing position. In the winter months, it may be necessary to tilt panels at a lower angle to capture sunlight. In the Northern Hemisphere, panel mounting is most effective at a south-facing angle. In contrast, equatorial regions favor vertical or near-horizontal roof position mountings. According to 2023 Solar Energy International research, shading obstruction can lead to a reduction in solar energy conversion efficiency of 50%. Because of this, some people use the online solar charting service SunCalc, which provides data on annual solar exposure distribution in various locations. For areas with frequent cloud cover, it is recommended to use solar panels with a capacity 30% greater than standard to offset energy capture limitations caused by cloud cover.
Evaluating Soil Type, Foundation Types, and Poles Pairing
Analyze soil type for foundation stability:
Sandy soil requires deeper concrete bases (36 inches)
For Clay soil, wider footings are necessary to avoid soil heaving.
On sloped soil, helical anchors are needed to prevent erosion.
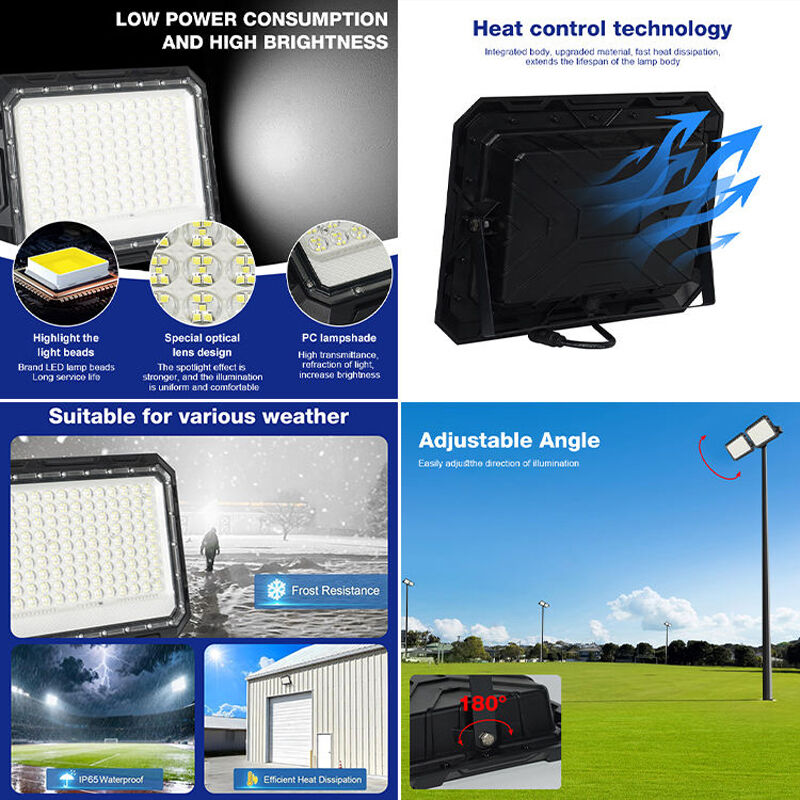
Select pole height per lighting requirement – use 10m poles for highways and 6m for residential walkways. Wind load ratings should be 20% greater than the region’s average. Galvanized steel that is corrosion-resistant should be used in coastal areas. Ensure that the bolt pattern is in line with the manufacturer’s design to avoid stress fracturing.
Preparation of Tools, Parts, and Safety Procedures
Basic DIY Equipment, PPE, and Strategy for Installation with Limited Tools
To begin, gather basic equipment like a solid set of wrenches, screwdrivers(both Phillips and flathead), some wire stripping tools, and a spirit level. PPE is compulsory; gloves, goggles, and a hard hat are required. Save a tool and a headache by utilizing multi-purpose tools. Also, for pole stability, check the integrity of the soil. Unstable soil will require the use of concrete anchors to secure the poles. Lastly, remember to turn off power to all the components before you begin the assembly. Live wires are a hazard, and are more dangerous than most people think.
Checking Components for All-in-One Solar Streetlights: Panel, Battery, LED Lamp, and Integrated Controller
You need to carefully inspect all of the components included in the package of the solar streetlight. For the solar panel, double-check to ensure that the panel cells and the protective glass panel are undamaged, scratched, or cracked. For the lithium battery, check the battery for bulges and verify that there are no rust spots on the terminals. If the LED light housing has weatherproof seals around the LED connectors, that is good, but also check that the wiring is completely insulated and that copper strands are not exposed. Control units need to be compatible with the system battery voltage, which is usually 12 or 24 volts depending on the system size. If you have not already done so, inspect and document the shipping damage. Research indicates that undetectable damage to components is responsible for 20% of the issues encountered in the first months after installation.
Step by Step Solar Streetlight Installation Guide
Establishing the Base and Positioning the Pole with Anchor Tilt Calculations
To create a solid base, you will be digging a hole 4 to 6 feet deep depending on your soil type. The hole must be wider than the pole diameter by 8 inches. While you pour the concrete around the anchor bolts, make sure to use a level to ensure they are straight. Leave the concrete to set for 24 to 48 hours before you proceed to the next step, as this is the standard curing time. Once the concrete has set, you will be able to attach the pole. Use an inclinometer to measure the amount of tilt for your pole. A good approximate for this is to use the area’s latitude, plus or minus 15 degrees, depending on the time of the year. For example, someone living at a latitude of 30 degrees will want their solar panels set to 30 degrees for the optimal solar absorption year-round. Ensure that all bolts are properly fastened using a torque wrench, as this is one of the most common causes of poor installation, leading to over 20% of structures failing within the first few months of installation.
Getting it correct from day one ensures protection from damage caused by heavy snow loads or strong winds, guaranteeing the solar panels will continue functioning efficiently for years to come.
Mounting the Solar Panel and Lamp: Alignment, Angle and Bracket Tightness
For best performance, have solar panels aimed within 5 degrees of true south (or true north if you are in the southern hemisphere). If panels are off by more than 15 degrees, performance drops 20%. Use stainless steel fastening brackets, and be sure the panel angle is in the ballpark of the local latitude. With LED lamps, the mounting height is typically between 15 and 20 feet, and the fixtures are to be aimed as needed, to avoid glare and unwanted light. Don’t skip the shake test - everything should be given a good shake to see if anything is loose. Remember that 4 out of 5 wiring issues are due to the positive and negative wires being crossed, so double check the red and black terminals match up, and then can go by the Solar Installation Standards Handbook. If a storm is expected, regular bracket maintenance can save a lot of headache.
Validating the Operation and Addressing the Typical Challenges of Solar Street Lights
Testing Night Activation, Runtime, and Charge Cycle
You can test the system at night by covering the panel to simulate daytime conditions. If the system is configured correctly, the streetlight should activate within a minute, and should stay on for many hours, depending on the charge level of the batteries. I recommend monitoring the runtime over a three-day cycle for charge/discharge cycling. If the light is cutting out consistently at approximately 80% of the runtime, the batteries may be faulty or the panels may be receiving insufficient sunlight daily.
Diagnosing Common Issues Such as Obstruction, Loose Fasteners, Incorrect Wiring Polarity, and Low-light Activation
There are a few common issues that can significantly reduce the efficiency of a solar street light.
1. Obstruction: More than 10% of the streetlight solar panel covered can potentially cause a 50% decrease in the output. Obstruction should be addressed monthly.
2. Loose fasteners: Streetlight panels and poles should be checked on a quarterly basis. Panels and Joints can loosen within six months due to manual vibration.
3. Incorrect polarity: If the wires are flipped the streetlight won’t turn on. Confirmation of red and black wires on the streetlight is needed.
Low-light misfires: It's recommended to clean the light sensor every year. Dust can cause early triggering of the sensor during dusk.
When problems continue, measure the battery's voltage during the day. If it's below 12.4V, there are issues within the charging system, and some parts need to be replaced.
FAQ Section
Which factors are important when choosing the location for my solar streetlight?
The ideal location offers maximum sun exposure and avoids shading areas, and the solar panel can be placed at the optimal latitude and longitude. Also consider soil and weather conditions.
How can I know the components of the solar streetlight are working?
Check the solar panel for any breakage and ensure that the battery, LED lamp, and integrated controller are functioning properly and within their voltage range.
What can go wrong with the solar streetlight?
The most common issues with solar streetlights are shading, loose hardware, wrong polarity connections, and low-light misfires. Performing regular maintenance can reduce these problems.